
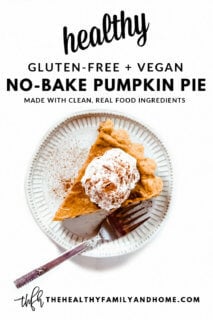
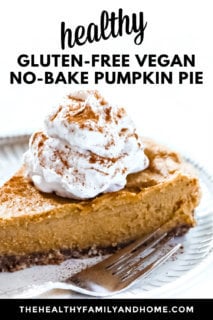
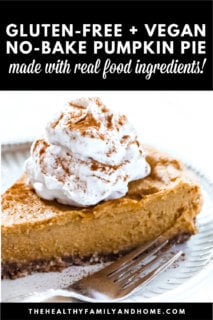
My healthy plant-based Gluten-Free Vegan No-Bake Pumpkin Pie is an easy recipe to make using 8 clean, real food ingredients and can be prepared in under 15 minutes! It's a healthy makeover recipe made without graham crackers, cashews, eggs, white sugar, white flour, butter or cream.

Estimated reading time: 33 minutes
Table of Contents
Here's Why This Recipe Works
My top 3 favorite reasons:
- Can Be Prepared In Less Than 15 Minutes
- Customizable Topping Options
- Made With Clean, Real Food Ingredients
You'll never have to pass up a rich and creamy pumpkin pie - especially during the Fall and Thanksgiving gatherings with my healthy vegan no-bake pumpkin pie recipe!
"Feel good about what you eat..."
- Karielyn Tillman
Ingredients
Here are the clean, real food ingredients I used to make this recipe. Try to buy organic if possible.
- Pumpkin Puree (100% pumpkin)
- Medjool Dates
- Coconut Oil
- Maple Syrup
- Pecans
- Pumpkin Pie Spice
- Vanilla Extract
- Himalayan Pink Salt
How To Make This Recipe: Step-By-Step Instructions
Here is how to make this recipe and I'll show you with step-by-step instructions below.
Before getting started, set aside a standard-size 9-inch pie pan. I like to use one with decorative edges, but you can use any type of pie pan.
Top Tip
Don't forget to remove the pits from the Medjool dates before adding them to the food processor and Vitamix!
Step 1: Prepare the Crust
Firstly, add all the ingredients for the crust to a food processor and process until it becomes a wet, crumbly texture.
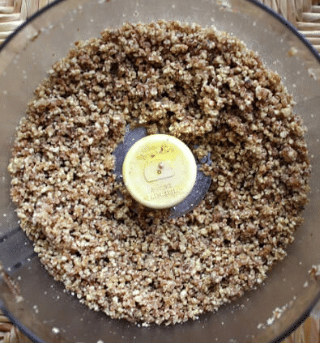
- Step 1: Add all the ingredients for the crust to a food processor and process until it becomes a wet, crumbly texture.
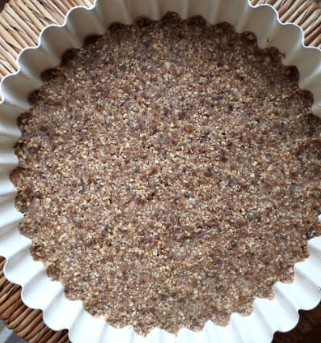
- Step 2: Transfer the crust to a pie pan of your choice. Press the crust mixture down as firmly as possible into the bottom of the pie pan. Set it aside while you prepare the filling.
Step 2: Prepare the Pumpkin Filling
Secondly, to get a creamy, silky, and smooth filling, you'll want to blend your ingredients in a Vitamix.
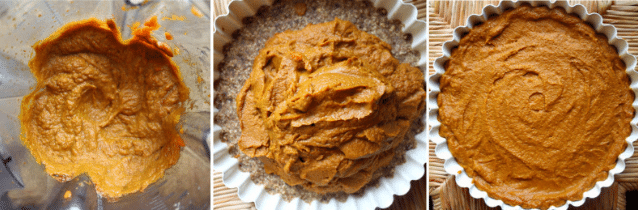
- Step 3: Add all the ingredients to a Vitamix and blend until it's creamy and smooth. Transfer the pumpkin filling to a pie pan and spread it evenly over the crust. Place the pie pan in the refrigerator for approximately 30-60 minutes to allow the pumpkin pie to firm.

Frequently Asked Questions
There are several different healthy plant-based options you can use to top your vegan pumpkin pie.
Therefore, I'll share with you (5) of my favorites below:
1. Serve it Plain - After placing the pumpkin pie in the refrigerator to chill, you can serve it plain without any toppings.
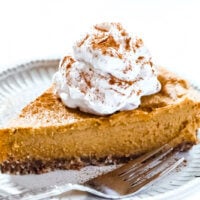
2. Add Dollops of Homemade Whipped Coconut Cream Topping on Top - Take a spoonful of Homemade Whipped Coconut Cream Topping and decorate the top of the pie with dollops.
3. Spread Homemade Whipped Coconut Cream Topping as a Top Layer - Similarly, you can use the Homemade Whipped Coconut Cream as a frosting layer to cover the entire top of the pie.
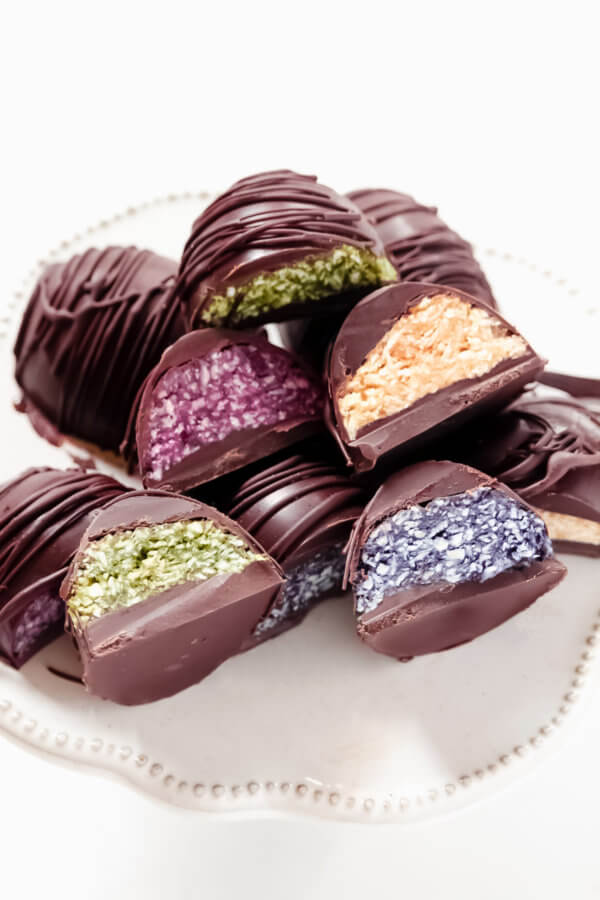
4. Drizzle Raw Chocolate Sauce Over the Top - Chocolate and pumpkin go great together and a little drizzle of Raw Chocolate Sauce over the top makes it extra special (not Medical Medium® compliant unless you substitute the raw cacao powder with carob powder).
5. Sprinkle Crushed Pecans or Walnuts on Top as a Garnish - Lastly, a garnish of crushed pecans or walnuts is the perfect topping for this healthy dessert!
Use my recipe for Homemade Whipped Coconut Cream Topping is really simple to make and adds an extra touch.
Layer - If you use the Homemade Whipped Coconut Cream Topping as a frosting layer on top of the pumpkin pie, you will use the entire recipe.
Dollops - If you use the Homemade Whipped Coconut Cream Topping as dollops on top of the pumpkin pie, you will have some leftover. Just save it for pancakes, waffles, parfaits, over fruit, etc.
Use my raw plant-based Homemade Chocolate Sauce that pairs perfectly with pumpkin pie.
Just make a batch and drizzle a little over the top of each piece before serving.
Keep in mind, unless you substitute the raw cacao with carob powder, the chocolate sauce would not be Medical Medium® Compliant.
Yes! And it's a great idea for portion control and easier serving.
You can make individual servings using this cute mini cheesecake pan, these 4-inch tart molds, and even mini dessert cups.
Just divide the crust mixture and the filling mixture evenly between whichever container you choose.
You want to make sure you use "Pumpkin Pie Puree" for this recipe because it only has one ingredient.
Organic Pumpkin Pie Puree or Organic Pumpkin: 100% Organic Pumpkin
Pumpkin Pie Filling or Pumpkin Pie Mix: Pumpkin, Water, Sugar, Salt, Spices, Dextrose, Natural Flavors
I like to use this brand because it is organic, 100% pumpkin and comes in a BPA-free can.
I used coconut oil in the crust to bind it together once it becomes solid and, in the filling, to firm it and hold it together.
But, not to worry!
If you don't like the taste or smell of coconut oil, you can use "refined" coconut oil which has zero coconut taste or smell.
I haven't tested the recipe with another blender, but if you use a blender that can break down the medjool dates you should be fine.
That is the only ingredient in the filling mixture that would be a potential problem with a regular blender.
In my opinion, yes!
Everyone enjoys a traditional Thanksgiving pumpkin pie, but your pumpkin pie doesn't have to include typical ingredients that are found in traditional pumpkin pie recipes.
Here are some of the ingredients you will find in a homemade S.A.D. (Standard American Diet) pumpkin pie recipe:
S.A.D. (Standard American Diet) Pumpkin Pie Ingredients:
Typical Filling Ingredients: heavy cream, evaporated milk, dark brown sugar, white sugar, refined salt, egg yolks
Typical Crust Ingredients: white, bleached flour, processed salt, white refined sugar, and an entire stick of butter
My healthy vegan pumpkin pie dessert is made with clean, real food ingredients and is plant-based, vegan, gluten-free, dairy-free, soy-free, egg-free, grain-free, flourless, no-bake, no refined sugar, paleo-friendly, and is Medical Medium® Compliant.
No...not at all!
You can whip up this healthy no-bake dessert in less than 15 minutes in just two short steps.
For example, the first step is making the naturally sweetened crust in a food processor.
And the second step is making the pumpkin pie filling in a Vitamix.
That's it!
Next you just need to let it firm in the refrigerator for approximately 30-60 before serving.
I would not suggest packing up this no-bake pumpkin pie to travel for holiday get-togethers and I'll explain why.
Because this is not a traditional pumpkin pie with a baked crust, it is made with a nut crust that is held together with coconut oil when it is in a solid state.
When the coconut oil becomes room temperature, it will melt and become soft, and liquid and the crust will fall apart.
For this reason, I would only use this recipe to serve at home for best results.
This no-bake pumpkin pie should be stored in a refrigerator until ready to serve and not left out on the countertop for the same reason it is not suitable for traveling.
Because this is not a traditional pumpkin pie with a baked crust, it is made with a nut crust that is held together with coconut oil when it is in a solid state.
When the coconut oil becomes room temperature, it will melt and become soft, and liquid and the crust will fall apart.
No, the recipe is technically not "raw" because the pumpkin puree is cooked before it is canned.
When I originally created the recipe in 2012, I labeled it "raw" because it was a "no-cook" or "no-bake" recipe, but I inaccurately labeled it "raw",
I apologize to anyone who came to this recipe looking for a true "raw" pumpkin pie made with uncooked pumpkin.
I have since changed the title to "No-Bake" which is accurate.
Karielyn's Expert Tips + Ingredient Suggestions
Here are some of my expert tips to make this recipe perfectly:
Pie Pan. An alternative to using a standard-size pie pan is to make individual pies in 4.5-inch tart pans. I like to use these for individual portion sizes (and portion control), and they are perfect for our family of four.
Pumpkin Pie Puree. Make sure you buy pumpkin pie "puree" and not pumpkin pie "filling. In addition, try to buy the pumpkin pie puree in a BPA-free can if possible.
Maple Syrup. This is not an overly sweet pie and has just a hint of sweetness. If you would like your pie filling to be sweeter, taste it after everything is mixed in the Vitamix, and if you would like it a little sweeter, add another ¼ cup of organic maple syrup and mix again until everything is blended well.
Vanilla Extract. If you need this recipe to be 100% Medical Medium® Compliant, substitute the organic pure vanilla extract with alcohol-free vanilla extract.
Optional Toppings. Both of these toppings are optional but take a plain pumpkin pie over the top!
Order Recipe Ingredients
Shop for ingredients to make this recipe and my favorite kitchen tools all in one place!
Gluten-Free Vegan No-Bake Vegan Pumpkin Pie
Equipment
Ingredients
For the crust:
- 2 cups organic pecans
- ½ cup organic Medjool dates (pitted)
- 1 tablespoon organic refined coconut oil
For the pumpkin pie filling:
- 2 cans organic pumpkin puree (15-ounce cans)
- 1 cup organic Medjool dates (pitted)
- ½ cup organic refined coconut oil
- ¼ cup organic maple syrup
- 2 teaspoons organic pumpkin pie spice
- 2 teaspoons organic pure vanilla extract*
- ⅛ teaspoon Himalayan pink salt
Instructions
- Set aside a standard-size 9-inch pie pan.
Prepare the crust:
- Add all the ingredients for the crust to a food processor and process until it has a wet, crumbly texture. Make sure to remove the pits from the Medjool dates before adding them in.
- Transfer the crust mixture to the prepared pie pan and press it down firmly.
- Set aside while you prepare the pumpkin pie filling.
Prepare the pumpkin pie filling:
- Add all ingredients for the pumpkin pie filling to a Vitamix and blend until everything is creamy and smooth. Make sure to remove the pits from the Medjool dates before adding them in.
- Taste and adjust the spices and sweetener if you prefer.
- Pour the pumpkin pie filling into the pie pan and spread it evenly on top of the crust.
- Transfer the pie dish to the refrigerator for approximately 30-60 minutes to firm.
- Store in the refrigerator until ready to serve or the crust will become crumbly and fall apart if left out on the countertop.
Serving options:
- Serve the pumpkin pie plain, without toppings.
- Serve with a layer of Homemade Whipped Coconut Cream Topping on top of the pumpkin pie filling.
- Serve with dollops of Homemade Whipped Coconut Cream Topping on top of the pumpkin pie filling.
- Serve with Homemade Chocolate Sauce over the top.
- Garnish with chopped organic pecans or organic walnuts.
Recipe Notes
Nutrition Information
Copyright Notice
The notes, instructions, and photographs for this recipe are copyrighted material and are protected under the Digital Millenium Copyright Act (DMCA). They cannot be used legally without my written permission.
More Healthy Vegan Pumpkin Recipes
- Vegan Pumpkin Spice Oatmeal
- Pumpkin Spice and Pecan Granola
- Gluten-Free Vegan Pumpkin Spice Blender Pancakes
- or my Real Food Vegan™ 14-Day Meal Plan Program with 42 plant-based vegan + gluten-free recipes made with clean, real food ingredients just like this one that you will love!


jamie says
This pie was amazing! It tastes better than traditional pumpkin pie. It's filled with all my favorite things. Thank you for sharing this deliciously healthy version 😉
Karielyn Tillman says
Hi there Jamie! Yay! I'm so glad to hear that you enjoyed the recipe!
Thanks so much for trying it out and for taking the time to let me know you liked it...I sincerely appreciate it! 🙂
Dawn says
This was Sooo good!! Will definitely be making it for the holidays.
Karielyn Tillman says
Hi there Dawn! I'm so glad to hear that you enjoyed the recipe!
Thank you for taking the time to try it out and letting me know you liked it...I sincerely appreciate it 🙂
Bgskygrl says
This looks delicious, I can’t wait to make it, but in your article and you repeatedly call this “ raw” pumpkin pie, which it isn’t.
Karielyn Tillman says
Hi there Bgskygrl! You are correct - the recipe is not 100% "raw" due to the pumpkin puree which is cooked 🙂
You are seeing the word "raw" in the title of the recipe because when I posted the recipe back in 2012, I mainly labeled it "raw" to emphasize the fact that is was not a "baked" or "cooked" pumpkin pie. However, as you pointed out, it is not a true "raw" dessert.
Not knowing back in 2012 what I know now regarding SEO, permalinks, etc., I titled the recipe "Raw Pumpkin Pie". And, I didn't know that a recipe title or permalink cannot be changed without major SEO consequences. Because of this, I cannot change the actual title (or permalink) to the recipe, but I have changed the title everywhere else and now refer to the recipe more correctly and accurately as "Gluten-Free Vegan No-Bake Pumpkin Pie".
I recently updated the recipe and included the word "raw" to correspond to the actual title (or permalink) but understand how it can be misleading to someone looking for a truly raw recipe. So I just updated the post to remove the word "raw" everywhere except the actual title (or permalink), which I cannot change.
Thank you for your feedback and I hope you enjoy the recipe if you decide to give it a try 🙂
Jessyca says
I have not found one coconut whip recipe where the coconut actually whips like whip cream, this one included. What coconut milk brand do you use? I have tried 6 different ones, and still nothing.
Karielyn says
Hi Jessyca! I'm sorry to hear you haven't had any luck with the whipped coconut cream recipes 🙁
I use three different brands...the Whole Foods 365 Organic Coconut Milk, Thrive Market brand ---> http://www.tkqlhce.com/click-5701456-13259174?url=https%3A%2F%2Fthrivemarket.com%2Fp%2Fthrive-market-coconut-milk-regular and this brand ---> http://www.tkqlhce.com/click-5701456-13259174?url=https%3A%2F%2Fthrivemarket.com%2Fp%2Fnative-forest-organic-coconut-milk that I get from Thrive Market. Of the three, I have better luck with the Native Forest brand.
Let's do a little troubleshooting so we can figure out what might be wrong:
1. Are you using the "full-fat" coconut milk? The "lite" coconut milk will not work as well..
2. Are you using "canned" coconut milk and not the kind in a box?
3. Are you using ~only~ the hardened part of the coconut milk (the fat part)? You would not use the entire can of coconut milk. The can of coconut milk would need to be put in the refrigerator at least overnight or in the freezer at least one hour before using. When you open the can, there should be a hard part on the top half of the can (which is the coconut fat). The bottom half of the can should be liquid (which is the coconut water). You only want to use the hard coconut fat part and do not use the liquid part. The harder the coconut fat, the better chance you have of it turning into whipped coconut cream. If it's soft or runny, it will not peak.
4. Are you using a mixer? I use a stand mixer (Kitchen Aid) and use the "whisk" attachment. I put it on high speed and let it whip it for a couple of minutes until it "peaks".
I hope this helps and if there is anything you need, please let me know 🙂
T Andrew says
Best Pumpkin Pie ever. I made 2 of these for Thanksgiving, and folks loved them. I used agar agar to insure firmness, and this pie held up beautifully after it warmed to room temp.
Karielyn says
Hi there T Andrew! I'm so glad to hear you enjoyed the recipe and even honored that of all the pumpkin pie recipes out there on the internet, you chose to make it for Thanksgiving!
Thank you for trying out the recipe and for taking the time to let me know you liked it...I really appreciate it 🙂